CHARGER:
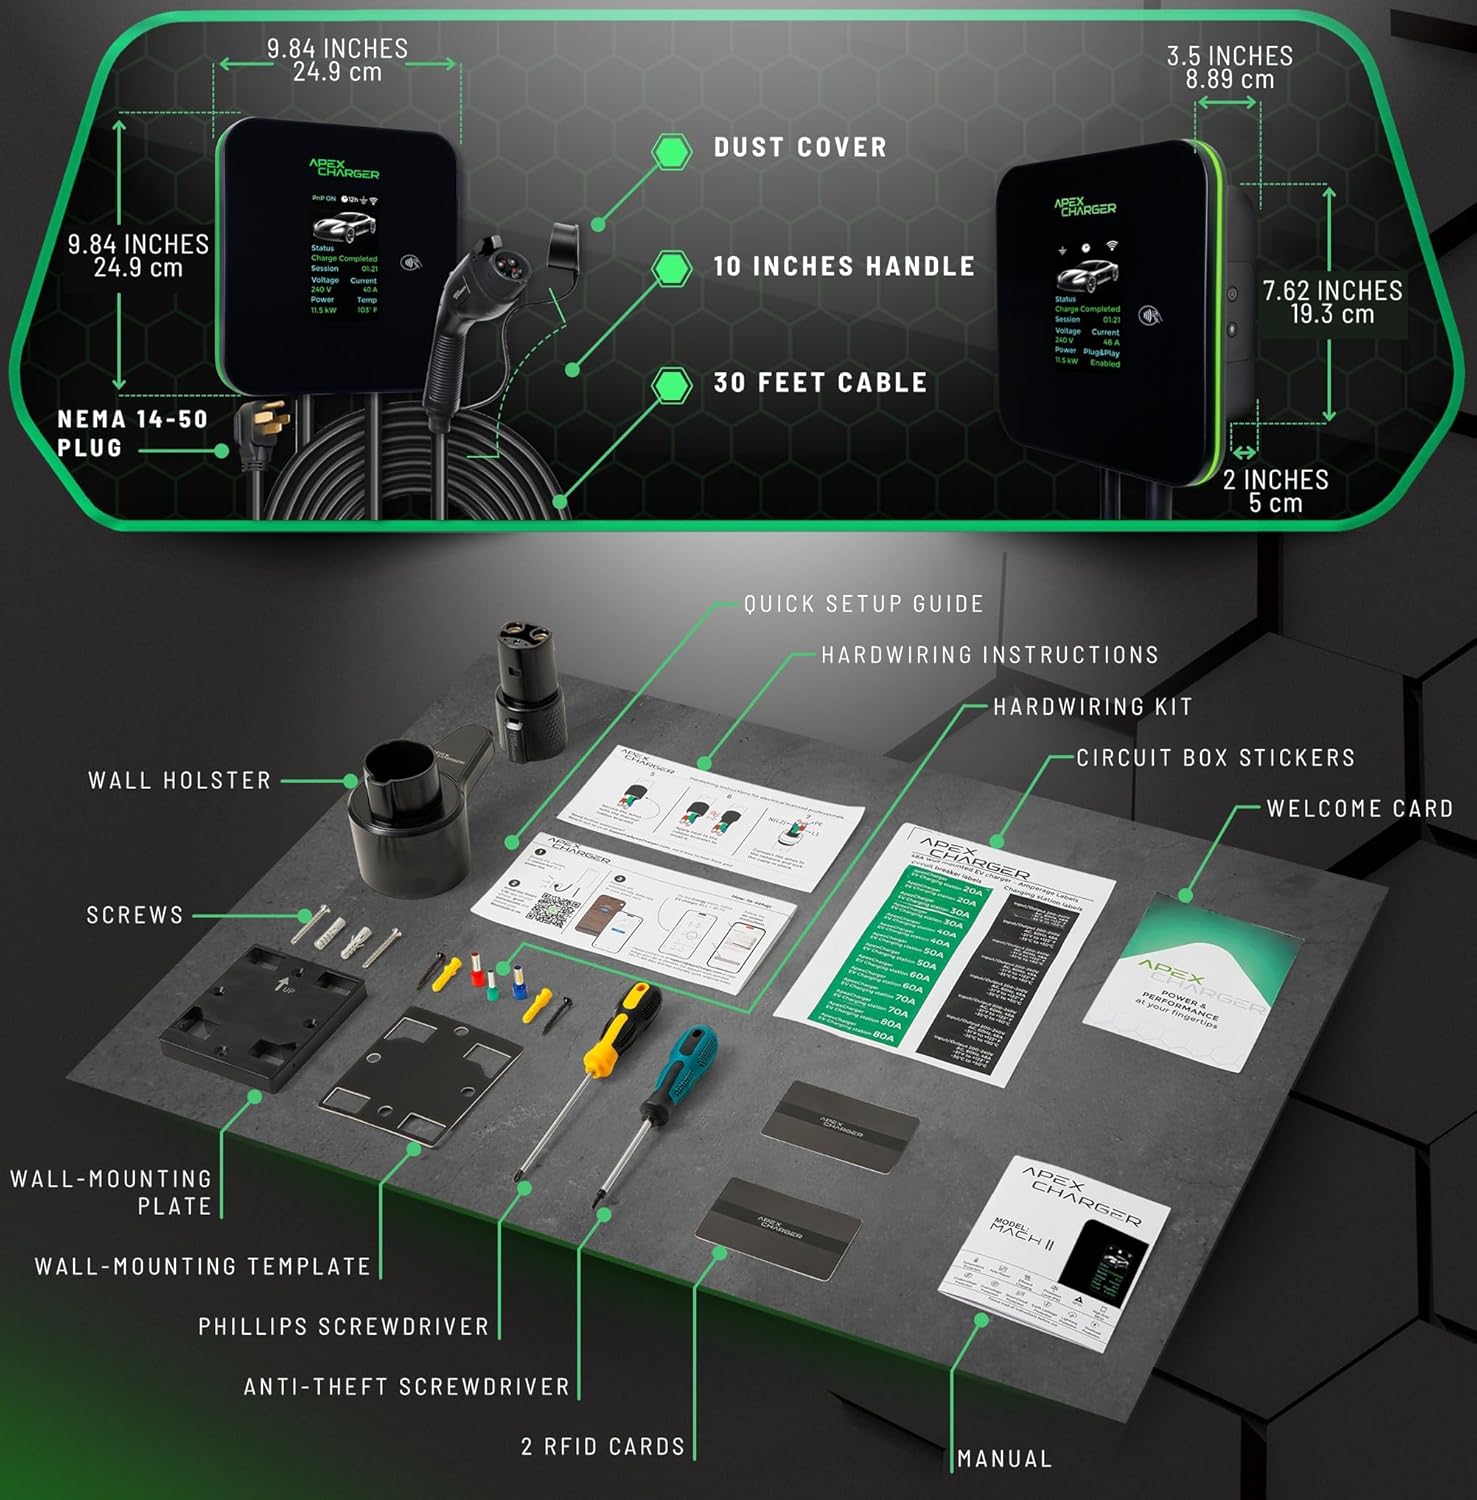
It does what it says it can do with charging up to 48Amps, when hardwired. It looks stylish. Has all the info I need on the display. Has an additional app with all the configurations anyone would need: Scheduling, delayed charging, and specifying the Amps (or kW) used for charging. This last one was the key feature why I bought this unit. In theory, charging at 20 Amps will reduce heat at the battery and prolong my battery life. 95% of the time, 20 Amps will be more than enough for me when charged overnight. If I need the full 48A, it's as easy as pushing the button on the side of the unit a few times (or using the App). Note: They currently use the Smart Life App, but customer support mentioned they were developing their own. DO NOT confuse it with the Apex EV app, like I did. That's a whole different company. Also, the only charger I found that comes with 30ft charging cord which was key in my installation to allow me to charge both inside and outside my garage.
CUSTOMER SERVICE:
This is the main reason I'm writing this review. I had multiple questions with my installation to make sure I was 100% good to go as a DIY installer. Each time, support responded in under 60 minutes with very helpful info. It didn't matter if my email was during the day, night, or weekend. That's how I treat customers for my business, and it's great to be treated that way when I'm someone else's customer!
INSTALLATION:
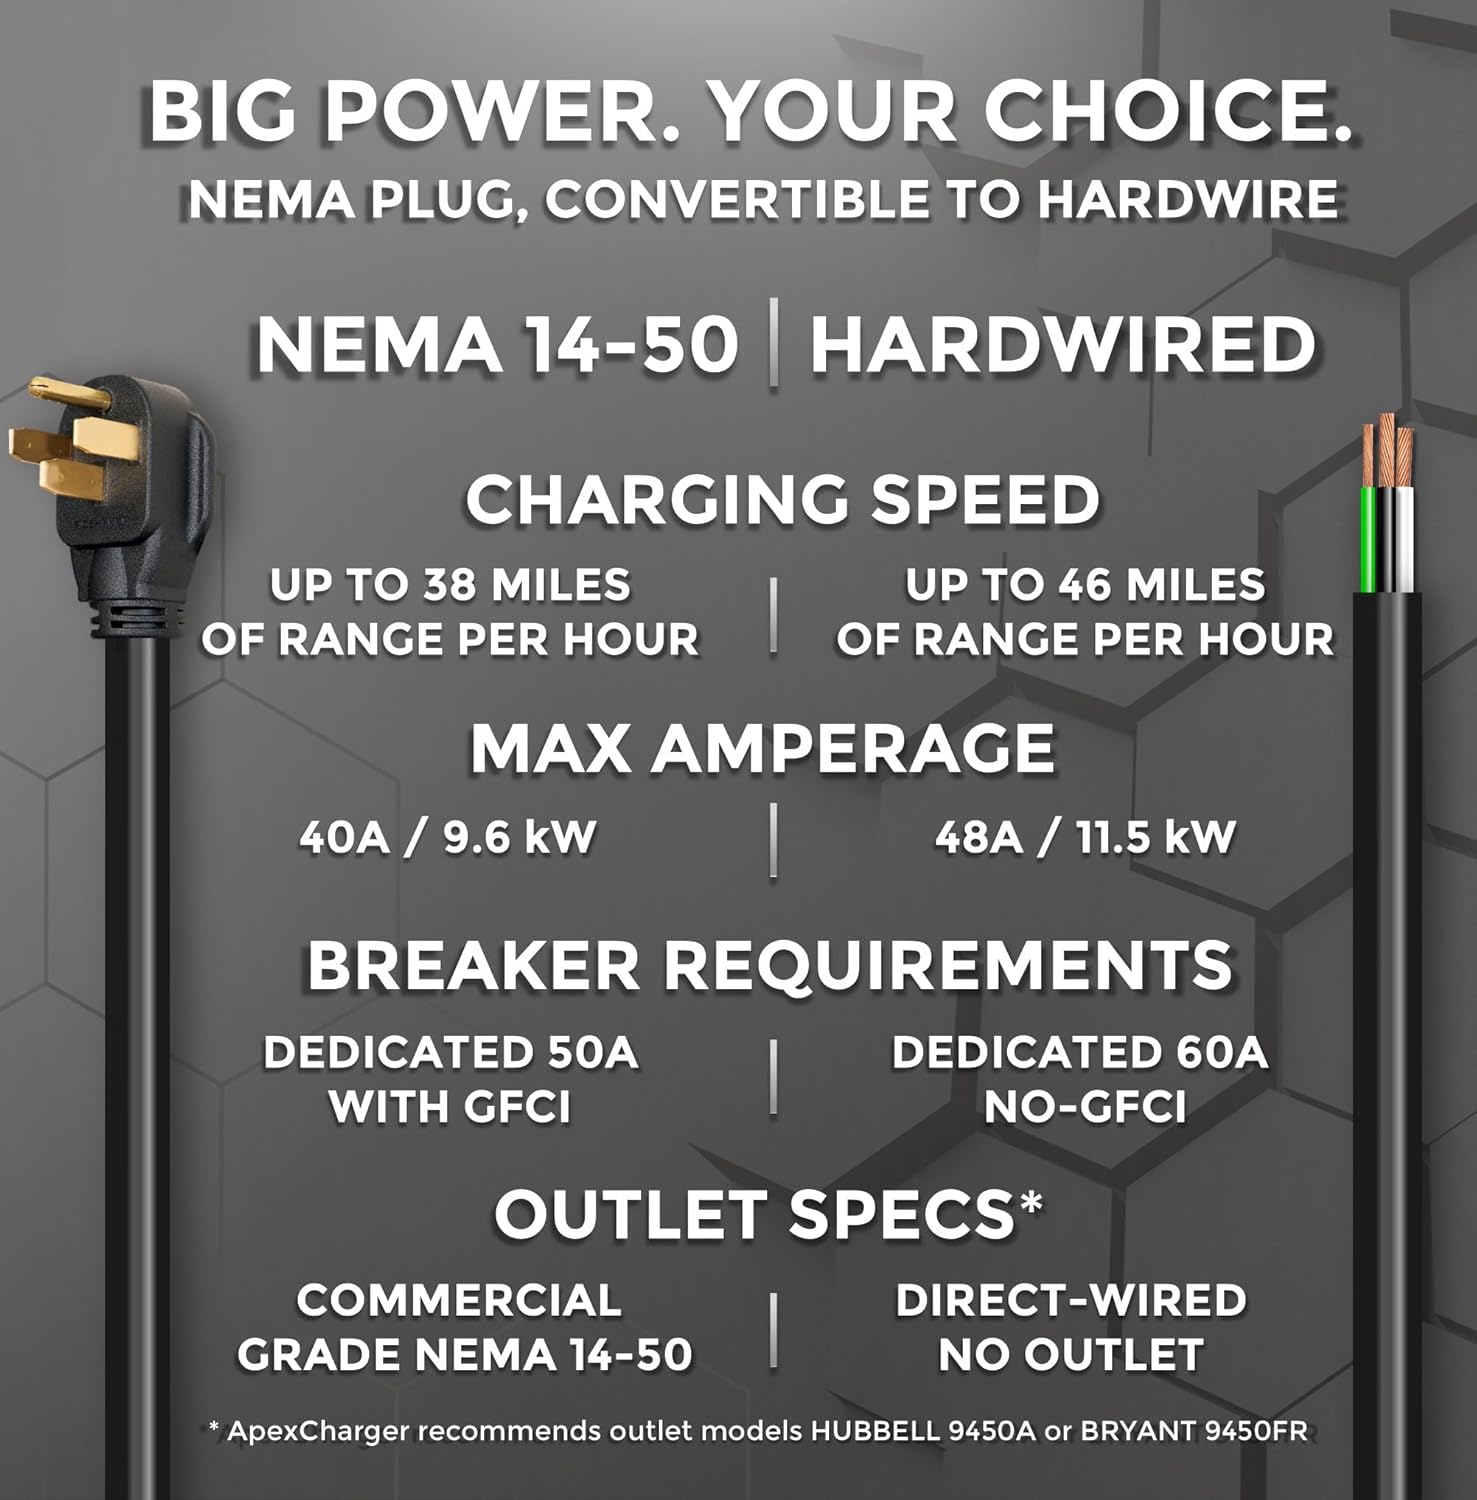
Notes: If you're comfortable around 240VAC and know a bit about household electrical wiring, I'd say this is a DIY job, which is what I did. Below is my installation journey. I hope it will help. I literally designed the whole setup using ChatGPT, and then double-checked everything on Google. I initially assumed the sub-panel already located in my garage would be sufficient. I mentioned this to ChatGPT and it started asking me the right questions that helped me quickly realize it was NOT sufficient. That panel was fed with a 60-amp breaker and I'm already running a mini-split, electric dryer, and general lighting off of it. It was working for my welder, but I'm guessing I never had the dryer running at the same time I was welding. So, I decided pull power directly from my main electrical panel in my basement. This required moving a couple of loads to "tandem" breakers to make room for the 60 Amp breaker. Note: for 48Amps, you'll need a 60 Amp breaker (must be 125% above the current). They also make tandem double-pole breakers that may be a better option for many of you. Note: The Amazon listing said NOT to use GFCI breaker, but the paper instructions said to use one. Customer support confirmed GFCI breaker was NOT necessary when hardwiring. From the main service panel, I pulled red and black 4AWG copper THHN and one 10AWG copper THHN through 1-1/4" liquid-tight flexible conduit with matching fittings. Pro-Tip: Pull the wires through the conduit in a straight run in your yard/driveway before installing the conduit and having to navigate bends. Best to let the flexible conduit relax in the sun for an hour first. Even when doing it this way, I could only push the fishtape 50-60'. My theory… I went with larger conduit than necessary expecting it to make my pull easier, but I now suspect the larger diameter allowed the fishtape to buckle/fold after 50' of resistance. So, if I did this again, I'd try 1" conduit, maybe even 3/4". So, I ended up putting an LB junction box in the middle of my 80' run. From my basement, I ran conduit to the outside of my home and then back inside the garage. LB junction boxes at every entry/exit point are the ideal way to do this as it breaks up a longer run and allows you to pull the wire in shorter runs, and it gives a cleaner installation look. Note: I'm not saying cut the wire here at these junction box. I'm saying cut the conduit here. I still had a full continuous 80' run of wire. The junction box is just a convenient "pull-point" because it's MUCH easier to pull 4AWG wire 30' than 50'! I could have gotten away with 6AWG copper wire, but I opted for 4AWG to reduce electrical losses (heat) due to voltage drop. The ground wire only needs 10AWG because it's more of a signal wire to detect faults than designed to carry current. Note: The charger's ground wire looked to be 6AWG, but unnecessarily oversized according my research. Neutral wire is not needed when hardwiring. It will be in the NEMA plug outlet on your wall if you're plugging the charger into an outlet, but the Mach 2 charger doesn't even have a neutral wire. At the end of my run (next to the charger), I cut the plug end off the charger and ran it into a junction box. where it connects to my 80' conduit run. I wanted to run directly into the charger itself, but the instructions said not to.
IMPORTANT:
-Connections NEED TO BE TORQUED to spec!!! This is a critical safety step that many DIYers skip. The in-lb torque wrench is cheap. USE IT!
-I read on many EV Charging forums that the Polaris style 14AWG to 4AWG connectors will melt because they are not rated for CONTINUOUS amperage. I opted for a "14 AWG to 2/0 AWG Dual-Rated 2-Port 1-Sided Entry Insulated Multiple Tap Connector, Black" from Home Depot (Model # G60005A Store SKU # 409255). These required 100in-lbs of torque, which is a fair bit of strength. I'm a big guy and barely got this done myself. Some of you will need to hold the connector with a large pair of pilers while someone else twists the torque wrench.
-I opted to use a large blue wire nut rated for 16AWG to 6AWG for the ground.
-60 Amp breaker was ordered from Home Depot.
-Wire: Ordered custom lengths at affordable prices from Wire & Cable Your Way (online). The company shipped right away. I recommend!
LESSONS LEARNED:
-Square D electrical panels have two styles of breakers, QO and Homeline. Get the right breaker for your panel.
-I didn't know what 2/0AWG was. It's pronounced "ought" (or "aught"), which I have heard of many times. Just never understood it. They use the "/0" for wires sizes larger than 2AWG. So, the 2/0 AWG rated connector I used is larger (beefier) and can handle more current (more heat).
-Use a deep 4"x4" junction box when joining the wires in order to not violate "stuffing" requirements. The 1-1/4" LB junction box I used was adequately sized. When in doubt, ChatGPT can quickly run these "stuffing" calculations for you.